More actions
| PX68k for PSP | |
|---|---|
 | |
| General | |
| Author | hissorii |
| Type | Computer |
| Version | 0.10 |
| License | Mixed |
| Last Updated | 2014/03/07 |
| Links | |
| Download | |
| Website | |
| Source | |
PX68K (Portable (x)keropi PRO-68K) is a SHARP X68000 emulator that could run on various devices including Android, iOS, PSP, Raspberry Pi and Mac OS X.
Installation
Preparation
Please prepare the BIOS ROM file. The file name can be one of the following, and it can be either lowercase or uppercase:
- iplrom.dat (required)
- iplrom30.dat
- iplromco.dat
- iplromxv.dat
If there’s no particular reason, it is recommended not to use iplrom30.dat. There have been reports of issues such as the inability to boot on PSP or problems with loading HD images.
You will also need to prepare the font file. The file name can be one of the following, and it can be either lowercase or uppercase:
- cgrom.dat (required)
- cgrom.tmp
If the font file is missing, running WinX68k (High-Speed Version) on your PC will generate cgrom.tmp, which you can then use.
If Human68K starts but the game cannot be launched, it is highly likely that the game does not work with the default 1MB memory. After launching HUMAN68K, input "switch" using the keyboard or software keyboard, then press the return key to run the SWITCH.X command and adjust the memory settings.
For the PSP version, the emulator currently has the memory limit set to 4MB, so please do not set a value larger than that using SWITCH.X.
Instructions
Create a directory named .keropi in the same directory as EBOOT.PBP and place the BIOS ROM and font files there.
If the emulator starts and immediately exits, please check the placement and filenames of these files.
Place the image files in the same directory as EBOOT.PBP. You can also create a subdirectory and place the files inside it.
The file extensions for files that can be loaded are as follows:
- .D88 .88D .HDM .DUP .2HD .DIM .XDF .IMG (FD image)
- .HDF (HD image)
If the file names are too long, they may extend beyond the UI screen.
User guide
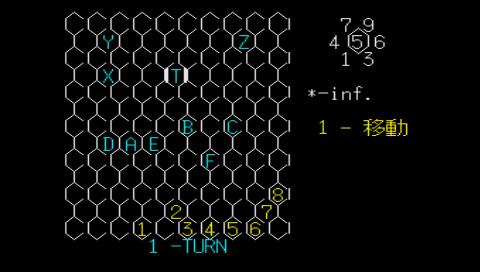
Menu UI
The Menu UI is used for selecting image files and adjusting various settings.
- To enter or exit the Menu UI, press the Start button.
- Use the Circle button to apply selected values.
- Use the Cross button to reset values.
Any changes made in the Menu UI will be saved when you either select SYSTEM > QUIT or press the Home button to exit the emulator.
- On the PSP version, settings related to VKey/VBtn will not take effect.
- To restore default settings, delete the .keropi/config file.
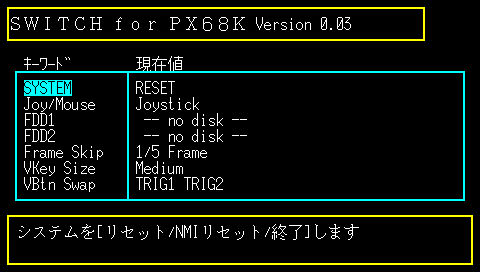
The contents of each option are outlined below (some of them are device-specific).
- [SYSTEM]
- [RESET] - Resets the emulator. After selecting an image file, you should execute this.
- [NMI RESET] - Performs an NMI reset. This is likely not needed at the moment.
- [QUIT] - Exits the emulator and saves any changes made to the settings in the UI.
- [Joy/Mouse]
- [Joystick] - Enables the virtual pad.
- [Mouse] - Enables the virtual mouse.
- [FDD0]
- [Image File Name] or [-- no disk --] - If an image file is selected, its name will be displayed. If no image is selected, "no disk" will appear. Selecting this will switch to file explorer mode.
- [EJECT] - Ejects the image file.
- [FDD1] - Same as [FDD0], but for the second disk drive.
- [HDD0] - Same as [FDD0], but for the SASI HDD.
- [HDD1] - Same as [FDD0], but for a second SASI HDD.
- If you want to connect more than two HDDs, check the value of HD_MAX using the switch.x command, and modify it if necessary.
- If you want to connect more than three HDDs, you will need to edit the config file directly.
- [Frame Skip] - Adjusts the frame skip setting. Set it to "Auto" for normal use. For extremely fast machines, set it to "Full". For slower machines, try values from 1/2 to 1/60.
- [Sound Rate] - Sets the output sound frequency. Higher values provide better sound quality but also increase the load. Selecting [No Sound] will mute the sound. Changes will take effect the next time the emulator is launched.
- [VKey Size] - This setting is only effective on the Android version. It adjusts the size of the virtual pad and virtual buttons.
- [VBtn Swap] - This setting is only effective on the Android version. Swaps the two virtual buttons.
- [TRG1 TRG2] - On the screen, Trigger 1 will be on the left, and Trigger 2 will be on the right.
- [TRG2 TRG1] - On the screen, Trigger 2 will be on the left, and Trigger 1 will be on the right.
- [HwJoy Setting]
- [Axis0 (Left/Right)] - Sets the physical pad’s left/right movement. Move the desired direction key to the left or right. The number displayed indicates the current setting.
- [Axis1 (Up/Down)] - Sets the physical pad’s up/down movement. Move the desired direction key up or down. The number displayed indicates the current setting.
- [Button0] - Sets the TRG1 button on the physical pad. Press the desired button to set. The number displayed indicates the current setting.
- [Button1] - Sets the TRG2 button on the physical pad. Press the desired button to set. The number displayed indicates the current setting.
- [Button7] - Sets the TRG8 button on the physical pad. Press the desired button to set. The number displayed indicates the current setting.
- After selecting an item, press the selection button to enter the setting mode.
- [No Wait Mode] - When set to [On], the emulator will run at full speed without synchronization. This may cause it to run faster than the real X68000 hardware. It might be useful on slower devices. Normally, [Off] is recommended.
- [JoyKey] - When set to [On], the physical keyboard’s arrow keys will move the joystick, and the z/x keys will function as joystick buttons.
Joystick
Use the D-Pad to move the joystick.
The Circle and Cross buttons correspond to Trigger 1 and 2.
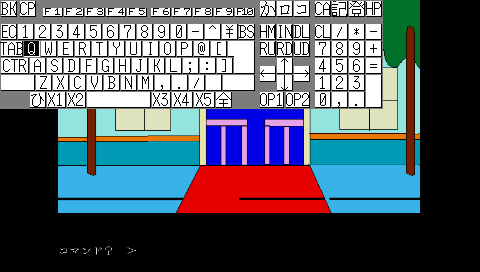
Keyboard and mouse
Keyboard usage:
- Toggle the keyboard on/off using the Select button.
- Move the keyboard itself using the Analog Pad.
- Use the D-Pad to select keys on the keyboard. The selected key will be displayed in black.
- Press the Cross button to input the selected key.
- Press the Cross button to input the Backspace (BS) key.
Mouse usage:
- To enable the mouse, select Mouse from the menu.
- The mouse and joystick cannot be used simultaneously.
- The Analog Pad is suited for coarse movement, while the Digital Pad is better for fine adjustments.
- The Circle button is used for left-click, and the Cross button is used for right-click.
Exiting the emulator
To exit, press the Home button or choose to exit from the Menu UI.
If you just turn off the power, config and SRAM data will not be saved.
Sound Output
For now, the PSP has a fixed sampling frequency of 11025Hz.
Screenshots
Known issues
The PSP takes about 10 seconds to shut down.
Credits
ひっそりぃ(hissorii)/sakahi
External links
- Author's website - http://hissorii.blog45.fc2.com/blog-entry-249.html
- GitHub - https://github.com/hissorii/px68k
| ||||||||||||||||||||||||||||||||||||||||||||||||||||||||||||||||||||||||||||||||||||||||||||||||||||||||||||||||||||||||||||||||||||||||||||||||||||||||||||||||||||