More actions
| RetroArch | |
 | |
| General | |
|---|---|
| Author(s) | Libretro development team |
| Type | Other Emulators |
| Version | 1.9.8 (22 Aug 2021) |
| Licence | Mixed |
| Links | |
| Download | |
| Website | |
| Source | |
<htmlet>adsense</htmlet>
RetroArch (formerly SSNES) is an open-source, multiplatform modular application capable of emulating various systems created by the Libretro development team.
The PSP version of RetroArch is initiated by aliaspider and can emulate a range of systems such as: Game Boy, Game Boy Color, Game Boy Advance, Nintendo (NES), MSX-1, MSX-2, PC Engine/TurboGrafx 16, NXEngine and PrBoom.
Features
- Consistency across multiple platforms (same UI structure and a fully featured command line interface).
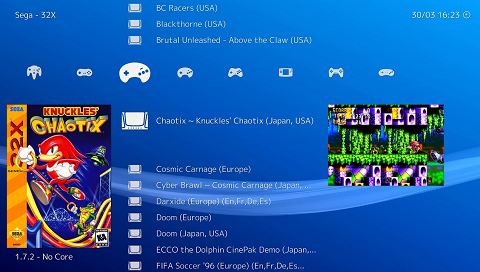
- Gamepad controlled menu system with multiple styles available, such as XMB or Material UI.
- Gamepad auto-configuration profiles, so that gamepads are mapped automatically when connected.
- Per-core and per-game configuration overrides.
- Custom resolution and refresh rate for video output, with exclusive fullscreen mode and monitor index for multi-monitor setups.
- Dynamic rate control for smooth audio and video, even when the game's output rate is different from your system.
- Basic fast forward, SRAM saving, savestate, etc. It supports serialization of the emulation state which is used to provide real-time rewind and netplay.
- Pixel shaders, primarily using Cg and GLSL, with HLSL on Xbox 360.
- Supports audio DSP filter plugins through .dsp configuration files.
- Custom overlay support.
- FFmpeg recording and playback support.
- Streaming support.
- GGPO-like netplay (latency hiding rollback).
- Options for decreasing input latency related to vsync by eliminating buffering by the video driver, as well as using frame delay to delay polling of inputs until right before a vsync occurs on the display.
- Run-ahead to reduce latency.
Installation
Note: In order to run RetroArch you need to have the latest version of Custom Firmware (PRO-C)/Pro CFW insalled on your PSP.
To install, create RetroArch folder under /PSP/Game/ directory and transfer the archive files to the /PSP/Game/RetroArch/.
Then go to Memory Stick under Game press Cross, note that the first or last application is must be RetroArch.
Also note that some specific cores require BIOS roms/files present in the system directory in order to run.
User guide
Please refer to Libretro Documentation, the official guide which contains the most up-to-date documentation on the usage of Libretro, Retroarch, and its cores.
Downloading Cores:
- RetroArch doesn't come with emulation cores, so you have to download them yourself. However, RetroArch does have a built-in updater.
- So to download up to date cores, scroll down to Online Updater, and select Core Updater.
- RetroArch will download a list of available cores to download, and you can individually download them. To see what core does what, see this list.
- If for whatever reason RetroArch can't download cores, or won't display a list of available cores for download, you can get them from the buildbot.
Running a Game:
- After downloading a core you can run a game by selecting Load Content> Select File And Detect Core and selecting your game.
- If you have only have 1 core that can run the selected game, then RetroArch will automatically load that core.
- If you have multiple cores that are capable of running the game you'll be given the choice between them.
BIOS and System files:
- Some emulation cores require special system files or BIOSes. Extract the system folder in that archive to where you installed RetroArch.
- If it doesn't find the BIOS, go to Settings> Directory> System/BIOS Dir (or find system_directory in the config file) and make sure it points to the system folder.
Core Options, Core Specific Settings:
- To edit options or settings specific to a core, you must start a game with that core.
- After loading a game, go to the RetroArch's menu to make changes in the Core Options (set core specific input options, cheats, change shader settings, etc).
Shader Settings:
- Shaders usually either come in single CG files or as a group of files controlled by a CGP preset file.
- If you want to use a preset, like CRT-Royale or Super-XBR, simply select Load Shader Preset under Shader Options and select a CGP file.
- If you want to select individual CG files, increase the Shader Passes and select a CG file through Shader #0 (or #1, #2, etc.).
- After selecting your shader setup, hit Apply Shader Changes.
Saves and Saving Settings:
- By default, RetroArch will save settings when it closes and will do so unless you put RetroArch in a directory that needs elevated privileges without running as administrator/root.
- Save New Config will save a new, different, config that won't be loaded the next time RetroArch starts.
Mednafen PSX:
- This particular core requires some specific care.
- You should have the correct BIOS (if not follow the BIOS and System files section), you'll also need to make sure your game has a metadata file in the form of a CUE, TOC, CCD or M3U file.
- The most common metadata people use is CUE, and if your PS1 game lacks a metafile, you can create one.
- An easier way to get around metadata issues is to get your games from a better source. Redump PS1 games come in BIN+CUE format and work on mednafen without issue, but other sets that come in BIN+CUE+MP3 format might need editing their cue file with Notepad with the correct filenames for them to work correctly.
Ricing RetroArch:
- There are 3 different menu drivers for RetroArch to choose from, RGUI, GLUI, and the default XMB.
- To switch between them go Settings> Driver Settings and switch Menu Driver. You'll need to restart RetroArch for changes to take effect.
Other customizations:
- You can change your wallpaper, text color settings, text size (DPI Override, GLUI only), toggle mouse support, and whether to display the boxart in the Menu Settings.
- You can change RetroArch's menu font, but it'll only work for the GLUI menu driver (only on 1.2.2, newer builds have changed GLUI significantly and it no longer uses the OSD font).
- To change it, under Onscreen Display Settings hit OSD Message Font and select a .ttf font file.
- Should be noted that Onscreen Display Settings are for the yellow popup messages that RetroArch displays and GLUI happen to use fonts from it, all of the other settings here only change the popup message.
- XMB loads its font from $assets_directory/xmb/monochrome/font.ttf, so you can replace the default font TTF with a custom one. The same can be done with the default backgrounds and icons.
Cheats:
- Not all cores support cheats, you can check the Libretro wiki for which cores do.
- By default RetroArch comes with a fairly large cheat database, so to make a new cheat file, you can find files in the cheats folder of RetroArch's install directory for reference.
- To enable cheats, load the game, toggle RetroArch's menu, load a cheat file in the Core Cheat Options and you'll get a list of cheats available which you can toggle.
- After setting your cheats, hit Apply Cheat Changes. Some cheats may require you to Restart Content to take effect.
Controls
Menu:
D-Pad Up/Down - Move through the menu
D-Pad Left/Right - Modify options
Circle - Accept, Enter Submenu
Cross - Cancel, Return previous menu
Triangle - Search
Square - Delete input bind
Start - Reset option to default
Select - Show tooltip for a particular option
L/R - Fast scrolling through files by jumping to the next letter
In game:
Note - Open/close menu
Screenshots

Compatibility
Require Custom Firmware (PRO-C)/Pro CFW (latest version).
External links
- Official website - http://www.retroarch.com
- GitHub - https://github.com/libretro
- RetroArch forum - https://libretro.com/forums/showthread.php?t=1635
- Emulation General Wiki - http://emulation.gametechwiki.com
- Pro CFW - https://code.google.com/archive/p/procfw/downloads
