More actions
| Emunand Switcher | |
|---|---|
 | |
| General | |
| Author | Storm21 |
| Type | System Tools |
| Version | 3.80_FWD |
| License | Mixed |
| Last Updated | 2024/11/19 |
| Links | |
| Download | |
| Website | |
| Source | |
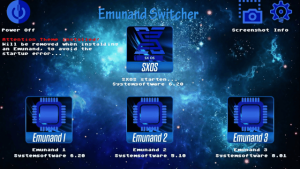
Emunand/Emummc Switcher Multitool for SXOS and Atmosphere.
This can simultaneously operate a maximum of three Emunands on the SD card per CFW and be changed with a few clicks. The Emunands and the content installed on SD are all separate and can be updated with different system software versions.
At the moment this is for SXOS and Atmosphere SD Emunand/Emummc. It works on all system software versions (payload) because it is an RCM app and will run before any CFW or Nintendo code follows.
Note: Use at your own risk. The author is not responsible if your SD card is broken, your Switch explodes or the moon falls to earth.
Installation
SXOS
Before installation, an Emunand must be created by SXOS and confirmed working. The installation should be done on the PC, console off, SD in the PC (important because of the Emutendo folder, otherwise there are errors). So not with NX-Shell or similar.
- Copy
emunandswitcherfolder to the root of the SD card.- An Emunand must already be installed
sxos/emunand= Emunand 1
- An Emunand must already be installed
- Copy desired emunandbackup into
emunandswitcher/folders sx/emutmp01= Emunand 2 - Copy desired emunandbackup into
emunandswitcher/folders sx/emutmp02= Emunand 3 - Optional for Themes and LayeredFS:
- Copy the content of
titlesfolder inemunandswitcher/folders sx/titles01= Emunand 2 Titles - Copy the content of
titlesfolder inemunandswitcher/folders sx/titles02= Emunand 3 Titles
- Copy the content of
The folder structure will change if an emunand is being switched, please do not change it. The app orientate on the folder which Emunand is installed, etc. If the original state is to be established, install Emunand 1. Then everything is in the state as only one Emunand would be installed.
- Edit
config.iniin theemunandswitcherfolder as you like: Edit only the back text, e.g.- Emunand 1 = System software 6.20
- Emunand 2 = System software 5.10
- Emunand 3 = System software 3.00
- Or
- Emunand 1 = Testemunand
- Emunand 2 = Systememunand
- Emunand 3 = Whatever
(After an update of an emunand the config.ini has to be edited again manually.)
- Copy emunsw.nro to
switch/emunsw/emunsw.nro. - Copy emunandswitcher 0104449021444000.nsp to SD root.
- Put the SD card back into Switch and boot SXOS.
The Emunandswitcher "emunsw.bin" can be started via a Payload Loader like Dongle, TegraRCM etc. But it is simpler to:
- Start from the Switch menu, install Emunandswitcher 0104449021444000.nsp.
- Start from the homebrew menu run Emunandswitcher there.
The installation is complete and configured and ready to use.
Atmosphere
Before installation, an SD Emummc must be created by hekate and confirmed working. It is best to save the eMMC folder with the archive bit set on the PC. Also secure the associated Nintendo folder. The installation should be made on the PC, console off, SD in the PC (important because of the Nintendo folder, otherwise there are errors) So not with NX-Shell or similar.
- Copy the
emunandswitcherandemummcfolders to the root of the SD card.- An Emunand must already be installed
emummc/SD00= Emunand 1
- An Emunand must already be installed
- Copy the previously saved
eMMCfolder toemummc/SD00, copy the contents of theNintendofolder toemummc/SD00/Nintendo - Emunand 2:
- Copy desired Emunandbackup to
emunandswitcher/folders atm/emutmp01= Emunand 2 - Copy the content of
Nintendofolder inemunandswitcher/folders atm/emutmp01/Nintendo= Emunand 2 Nintendo - Copy the content of
contentsfolder inemunandswitcher/folders atm/contents01 copy= Emunand 2 Titles
- Copy desired Emunandbackup to
- Emunand 3:
- Copy desired Emunandbackup to
emunandswitcher/folders atm/emutmp02= Emunand 3 - Copy the content of
Nintendofolder inemunandswitcher/folders atm/emutmp02/Nintendo= Emunand 3 Nintendo - Copy the content of
contentsfolder inemunandswitcher/folders atm/contents02 copy= Emunand 3 Titles
- Copy desired Emunandbackup to
- Copy the content of
titlesfolder inemunandswitcher/folders atm/- Release 2.11 changes: Mini update.
- Reload button in "Edit Config" to see the saved entries immediately.
The folder structure will change if an emunand is being switched, please do not change it. The app is based on the folder which Emunand is installed, etc. If the original state is to be established, install Emunand 1. Then everything is in the state as only one Emunand would be installed.
- Edit
config.iniin theemunandswitcherfolder as you like: edit only the back text, e.g.- Emuemmc 1 = Systemsoftware 3.00 ATM
- Emuemmc 2 = Systemsoftware test
- Emuemmc 3 = Systemsoftware XXX ATM
(After an update of an emunand the config.ini has to be edited again manually.)
- Copy emunsw.nro to
switch/emunsw/emunsw.nro. - Copy emunandswitcher 0104449021444000.nsp to SD root.
- Put the SD card back into Switch and boot Atmosphere.
The Emunandswitcher "emunsw.bin" can be started via a Payload Loader like Dongle, TegraRCM etc. But it is simpler to:
- Start from the Switch menu, install Emunandswitcher 0104449021444000.nsp.
- Start from the homebrew menu, run Emunandswitcher.
The installation is complete and configured and ready to use.
Note: If the Atmosphere CFW version is changed (New SD Files), the fusee-primary.bin payload in the emunandswitcher/payloads folder must also be replaced with the new one. Also the files in the titles folders must be replaced by the new ones. Otherwise Atmosphere will not start anymore.
User guide
How to use
Start the Emunandswitcher via the desired method:
- start via NRO in the Homebrew menu, or
- start NSP in the Switch Menu, or
- send the payload.
Select the desired CFW on the Switch.
- The app provides notifications when a theme is installed, and it also detects and displays when a theme has been deleted. To prevent the startup error that may occur after a system software update, it's necessary to delete the theme using the Tools option.
- The Themes and other LayeredFS files in the titles folder are moved when changing an Emunand, and each of them are bound to the installed Emunand.
Select desired tab ...
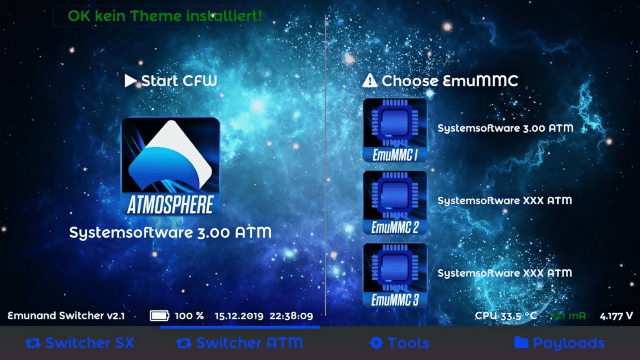
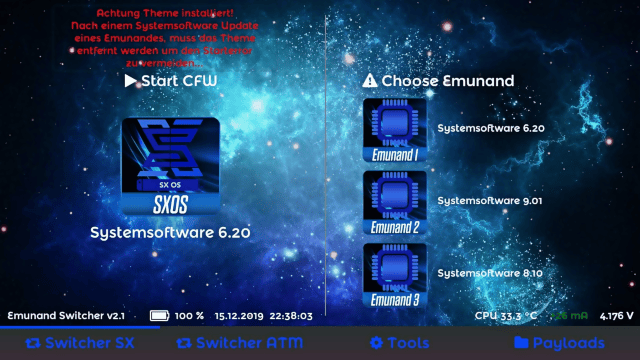
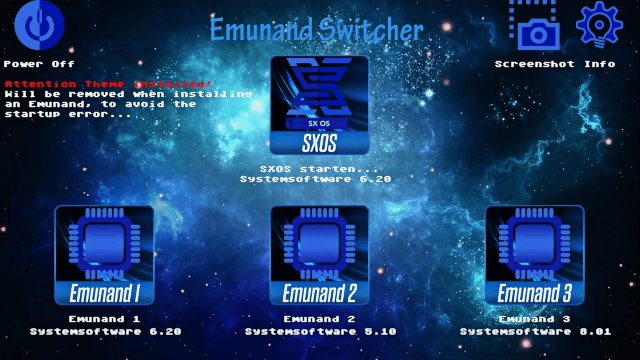
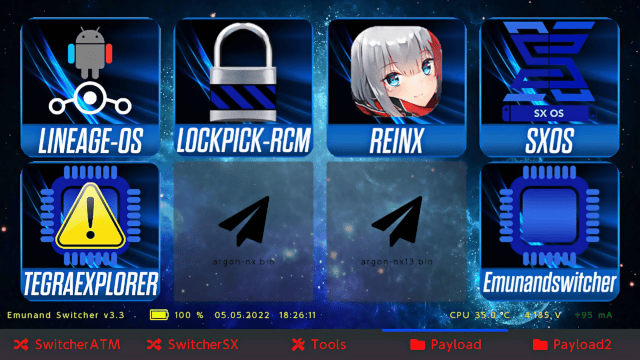
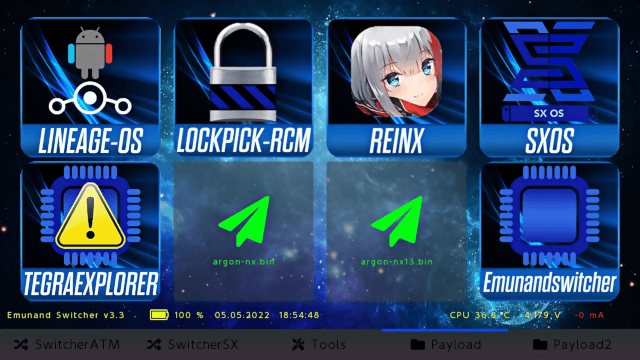
- Under "Start CFW", the currently active emunand is being updated from config.ini. "Emunand 1 - 3" displays the input in the config.ini.
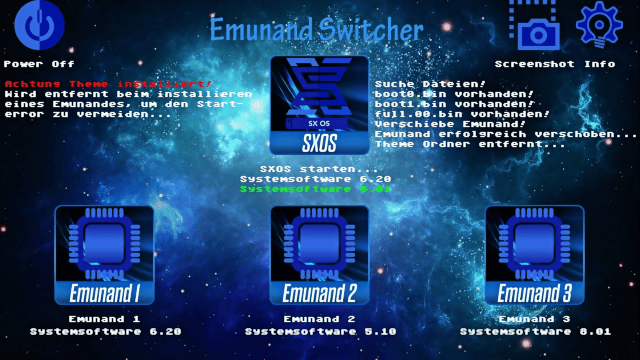
- To change an Emunand, press on the desired icon. The app always tells you what is done or if something went wrong. Nothing is changed if the conditions are not right.
- (Note: With SXOS only boot0.bin, boot1.bin and full.00.bin are checked because there can be different sizes of an emunand. Atmosphere checks if the folder eMMC exists.)
- After the change, the changed emunand is displayed under "Start CFW". Start with the CFW icon, the CFW will start with the changed Emunand.
- Repeat these steps for every change you want.
To make the original state just install Emunand 1 and start CFW.
Power tools
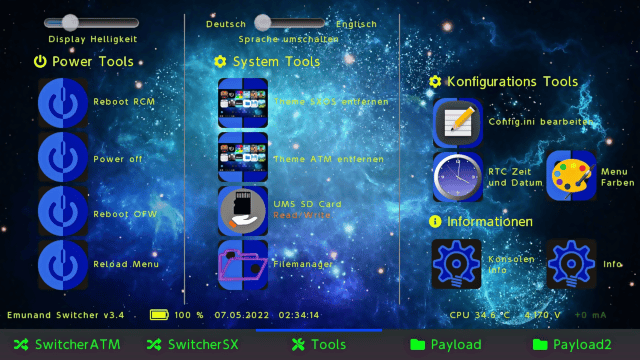
Power Tools - Option for RCM Reboot, Power off or Reboot OFW.
Brightness - Can be adjusted with the slider, the brightness is saved automatically and the value is loaded automatically when the app is started.
Config tools
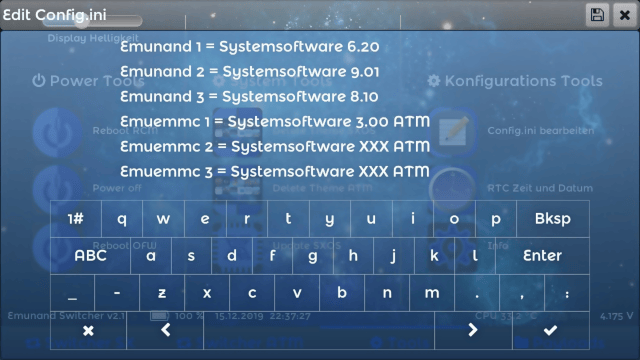
Edit Config.ini - Open the window, select the desired text line and edit as described above. The disk symbol is used to save, exit the window with X.
(Note: Only the currently installed Emunand is updated in the menu immediately, the other texts are only displayed after restarting the app.)
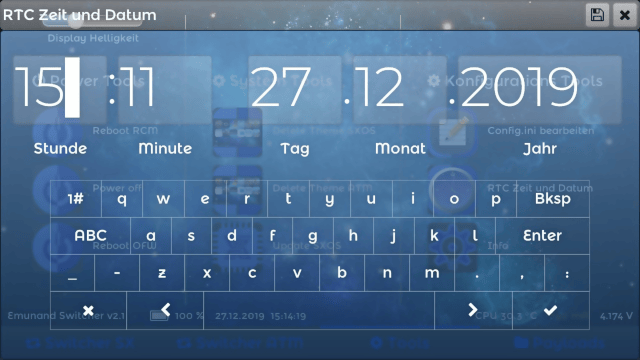
RTC time and date - Open window, switch keyboard to numbers, change desired entry. The disk symbol is used to save, exit the window with X. Format of time and date: HH:MM, DD.MM.YYYY e.g. 15:06, 01.08.2019, always fill with 0 for single-digit numbers.
System tools
Delete Theme SX/ATM - Deletes the theme of the currently installed Emunand.
Update SXOS
- Copy boot.dat e.g. with nxmtp to folder
emunandswitcher/updateSX. - Start Emunandswitcher, under Tools click on Update SXOS.
- Restart CFW via SXOS Icon or via Payload Tab if Argon is present.
Controls
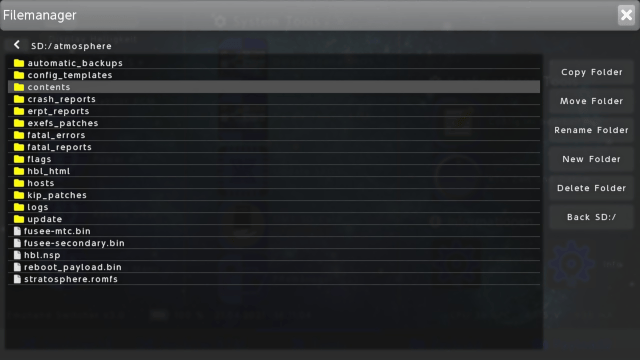
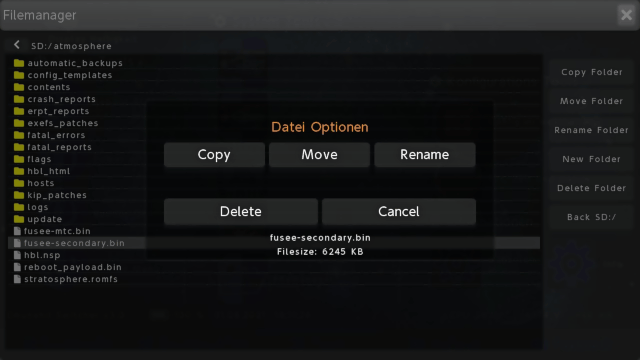
File manager:
Joy-Con - Mouse
A - Enter folder/Choose buttons
B - Back folder
X - Close Window
D-Pad Up/Down - Filelist navigation
Screenshots
Changelog
3.80_FWD 2024/11/19
- Emunandswitcher Release 3.80
- Emunandswitcher v3.80 Forwarders for AMS1.8.0+
- Updated Forwarders v3.80 Atmosphere Version1.8.0+
3.8 2024/07/29
- bdk update to 6.10
- Language selection and function changed to have more languages.
- Added Unicode and special characters for more languages.
- Added Spanish by Impeeza
- Chinese by Faker Dev
3.7 2024/07/29
- New feature: Message when a partition EmuMMC is activated and an SD EmuMMC is selected.
3.6 2022/09/20
- New feature: Ability to load a custom splash for each payload.
- The image must have a resolution of 1280x720px and format ARGB32, like background.bmp.
- The image must have the same name as the payload and be located in the "argon/payloads" folder, e.g. at fusee.bin = fusee.bmp.
3.5 2022/06/27
- File manager, copy file and folder added percentage display, autoclose info window after copying.
- Updated to 3.5.
- General bug fixes and stability fixes.
3.40 20222/05/16
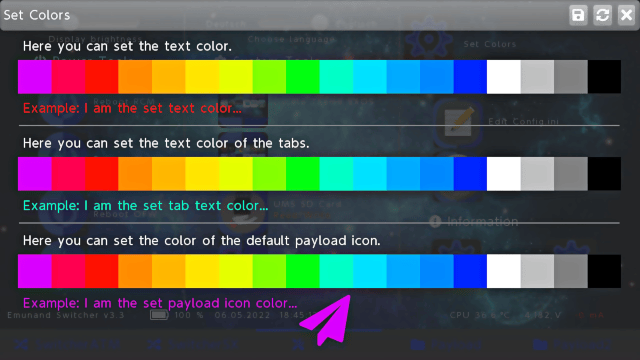
- Menu colors can now be set arbitrarily:
- Textcolor.
- Tab Textcolor.
- Standard Payload Icon color.
- Updated to 3.4.
- General bug fixes and stability fixes.
3.30 2022/04/29
- Update to hekate bdk 5.7.2.
- AULA OLED Switch support.
- Hardware Info Page revised.
- Payload ATM changed to fusee.bin, it is also possible with fusee-primary.bin but fusee.bin is preferred.
- Fix slider brightness value for AULA.
- Updated to 3.3.
- General bug fixes and stability fixes.
- Thanks @dezem und https://gbatemp.net/members/twocool4life86.591345/ for the AULA OLED tests, without them this version would not have been possible.
3.20 2021/10/31
- Typo fixed.
- Tools Tab: Choose language switch added Deutsch / Englisch.
- Selected language is saved in lang.ini GER / ENG.
- Update to v 3.2.
3.10 2021/07/06
- Build with newest hekate HW Libs 5.5.7.
- ATM Tab first.
- Some Buttons Theme fix.
- Fixed a Error after autoclosing a window with X Button (Close Filemanager and other Windows).
3.00 2021/04/26
- New Features 3.0:
- Build with newest hekate HW Libs
- Mariko Support
- Joycon Mouse
- UMS SD Card
- Hardware info Page
- Reload Menu
- Added Filemanager for Argon and Emunandswitcher
- Added Reboot Menu with Power Button
- Forwarder and Reboot to Payload files fixed for Atmosphere 19+
- Partition or SD Files Switcher*
- Key assignment usage Filemanager:
- Touch screen as usual
- Joycon Mouse, A = Enter folder / Choose Buttons, B = Back Folder, X = Close Window
- Joypad up / down Filelist navigation, A = Enter folder, B = Back Folder, X = Close Window
- If SD files works (emummc.ini of SD files is in the folder "emummc"), the emummc.ini of a partition emummcs can be copied / renamed to "emunandswitcher/folders atm/emummc/emummc_part.ini". You can now switch between partition and SD files... The contents are temporarily in "emunandswitcher/folders atm/contentsPA" for partition or "emunandswitcher/folders atm/contentsSD" for SD files.
2.11 2020/10/02
- Reload button in "Edit Config" to see the saved entries immediately.
- Since the SD Files Emummc from Atmosphere now works correctly with the latest system software, "titles" folder changed to "contents".
Credits
Created by Storm 2019 with Visual Studio, LittlevGL and DevKitPro, based on argonNX and hekate.
Icons template and some code lines by @mrdude. Thanks to the programmers. Thanks also to Gabor for LittlevGL.
External links
- GitHub - https://github.com/Storm21CH/Emunandswitcher
- GBAtemp - https://gbatemp.net/threads/emunand-switcher-3-00-multitool-for-sxos-and-atmosphere.539727/
- psXtools.de - https://psxtools.de/forum/index.php?thread/79602-release-emunand-switcher-by-storm21-der-emunand-wechsler-f%C3%BCr-sxos-und-atmosphere/
