More actions
| DSLearnJ | |
|---|---|
 | |
| General | |
| Author | Zarxrax |
| Type | Other Apps |
| Version | 0.5 |
| License | Mixed |
| Last Updated | 2007/03/16 |
| Links | |
| Download | |
| Website | |
| Source | |
DSLearnJ is a homebrew application for the Nintendo DS that helps you to learn Japanese Kanji more easily.
DSLearnJ is developed by Zarxrax using PAlib and utilizes a JIS display library by Benjamalin, creator of JapFR.
Features
- Create your own decks of cards with up to 256 cards per deck.
- Each card has 3 sections so you can include the Kanji, the reading, and the meaning.
- Choose which sections will be hidden until you press the button to reveal them.
- A drawing pad is included so you can practice drawing the Kanji.
- Cards can be displayed either in order, or randomly.
- You can choose to not display a card again after marking it correct. This allows you to focus on the cards you have trouble with.
Installation
Download the file and unzip the appropriate version for your hardware. If necessary, you should then patch it with the DLDI patcher.
Copy the patched rom and the DSLearnJ folder to the root of your flash card.
All input files must go inside the DSLearnJ folder, and the folder must be located at the root of your flashcard. A few sample files can be found in source.zip.
User guide
Main Menu
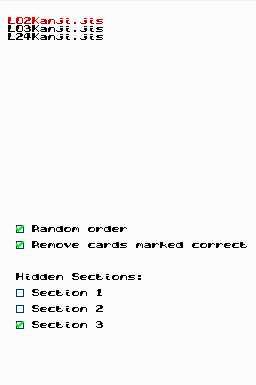
Upon launching the program you will see a list of files on the top screen, and some options on the bottom screen.
First, set the options how you want them and then use Up/Down on the D-pad to highlight a file, then press the A button to start. Here is a run-down of the options:
- Random order - If this is selected, cards are displayed in a random order. Otherwise, they are displayed in the order they appear in the input file.
- Remove cards marked correct - Once you mark a card as 'correct' then it won't be displayed anymore during that session. If this is unchecked, then all cards will continue to be displayed, regardless of if you mark them as 'correct' or 'incorrect'.
- Hidden Sections - Each card is seperated into three sections, and you can select which sections you want to remain hidden until you press the 'switch' button.
Interface
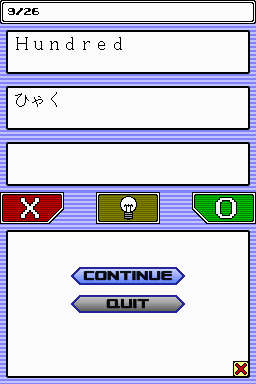
At the very top of the top screen, it displays the number of cards you have marked 'correct' out of the total number of cards.
The top screen also displays the three sections of the card. Sections will be hidden according to what you chose in the options.
On the bottom screen, there are three buttons along the top. The red "X" button will mark the current card as 'incorrect' and advance to the next card. The brown button with the light bulb will switch the hidden sections of the card on or off. The green circle button will mark the current card as 'correct' and advance to the next card.
The large area on the bottom screen is the drawing pad. You can scribble on here to practice drawing the kanji.
In the bottom-right corner of the drawing pad is a little "X" icon that you can use to clear the drawing pad.
Creating custom decks
The decks must adhere to some specific rules. There is currently no error checking in the software, so if you try to open a malformed file the program will probably crash.
To create your own decks, you need to get the free program JWPce.
After launching this program, you will see these icons around the middle of the toolbar:
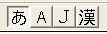
The first icon is the Kanji input mode that allows you to type hiragana. After you have typed some hiragana, you can select characters that you want to convert to kanji and then press the "Kanji Convert" button, which is the last one in the image above. The hotkeys for Kanji input mode and Kanji convert are Ctrl+K and F2, respectively.
The icon with the "A" on it is the ASCII input mode. Do NOT use this mode. DSLearnJ is not equipped to handle this kind of text at the moment, and using it will likely cause DSLearnJ to crash.
The icon with the "J" on it is the JASCII mode. Use this mode to type English characters. The hotkey is Ctrl+J.
Each line in your file represents a card, and the three sections of each card must be seperated by 2 commas (NOT ASCII mode commas!). Each line in the file must be in this format, with no exceptions. You can have up to 28 characters in each section, but after the 14th character the line will wrap automatically.
If you don't want it to wrap in the middle of a word, just insert some spaces. It is recommended you open up the sample files included in DSLearnJ so you can see what the formatting is supposed to look like.
After creating your deck in JWPce, go to the File menu and select Save As. In the "Save As Type:" drop-down box, select "New JIS (*.jis)". Files MUST be saved in this format.
Controls
Left or Y - Mark a card as incorrect
Up or X - Switch the hidden sections on/off
Right or A - Mark a card as correct
Down or B - Clear the drawing pad
Start - Bring up menu
Screenshots
External links
- Author's website - http://ds.amvhell.com/ (archived)