More actions
| Noob-Friendly L4T Ubuntu | |
|---|---|
 | |
| General | |
| Author | Refriger8tor |
| Type | Operating Systems |
| Version | 2019 |
| License | Mixed |
| Last Updated | 2019/06/01 |
| Links | |
| Download | |
| Website | |
| This application has been obsoleted by one or more applications that serve the same purpose, but are more stable or maintained. |
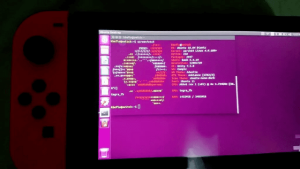
Noob-Friendly L4T Ubuntu is a project that provides a pre-configured image of Ubuntu for Tegra Linux on the Switch. It is based on the port by bylaws and aims to make Linux more accessible to beginners. It includes some software such as Retroarch, Dolphin, Steam and Chromium.
A basic guide is included, essentially you just need to download the image, install balenaEtcher, and flash your SD Card. Then, using either a different Linux computer (or booting your windows computer into linux using a USB Live Drive) you can resize and expand the fat32 partition to dualboot with your CFW, and/or expand the ext4 partition to make more room for Ubuntu programs and files.
The username and password are both "switch".
Note: Outdated. Consider using Switchroot's Linux distribution for Switch instead.
User guide
What you need
- Flash drive.
- microSD card (recommended size 32GB or higher).
- Computer with internet connection, SD card slot, and USB ports.
Instructions
- Download NOOBS from the Google Drive link.
- Download balenaEtcher.
- Download GParted Live.
- Copy all the files off of your SD Card to a safe location on your computer.
- Install balenaEtcher.
- Extract NOOBS.
- Flash NOOBS to your SD card using balenaEtcher.
- Flash GParted Live to your USB using balenaEtcher. (Note this will delete all files, backup accordingly. Also if you prefer Ubuntu Live or have a dual boot or different linux computer that works too).
- Boot your computer into the GParted USB.
- Resize the partitions on your SD Card to whatever split you desire (fat32 will be for switch, ext4 for ubuntu).
- Boot back into Windows.
- Copy all your SD files back to the FAT32 partition.
- Inject hekate, hit launch, more configs, and then L4T.
- Once booted, swipe in from the top-right corner and hit system settings, and the Bluetooth settings. If any joycons are already listed, tap them and then tap the minus button to remove them.
- Tap the plus button and the the sync button on one of your joycons. Wait for it to appear in the list, and then tap it and then "next". Repeat with the other joycon. Their LEDs should be flashing now.
- Press L and R at the same time on your joycons. They should now both have only the first LED lit. You can now use the joycons wirelessly as a mouse or as a controller. You can slide them into the rails if you want a handheld experience, but they will still be connected over Bluetooth. Press L3 to toggle mouse control on/off. Bear in mind you will need to repeat steps 13-15 every reboot, although occasionally one joycon may remain paired between boots.
What's included
- Update 1.3.1 preinstalled.
- Retroarch and Dolphin.
- Kodi 17.6.
- GIMP 2.10.
- Google Messages and GroupMe.
- LibEReader.
- Python, Java, Javascript, Rust, C/C++, C#.
- Vim with a buttload of plugins.
- GZDoom.
- Reicast.
- 2GB Swap File.
- NEW: PCSXR.
- NEW: Moonlight.
Changelog
Update 6/16
- Installed and configured PCSXR, you'll need to download BIOS for it to work.
- Installed and configured Moonlight, use "moonlight pair xxx.xxx.xxx.xxx" and "moonlight stream xxx.xxx.xxx.xxx" to use it (replacing x's with your PC's IP address).
- Created a centralized roms directory in the home folder.
Update 6/8
- GZDoom Installed and Configured.
- Reicast Installed and Configured.
- Reconfigured mouse controls (toggle joycon mouse controls with L3).
- Full OpenJDK installed.
Update 6/2
- Fixed Retroarch.
- Forgot to mention before, but 2GHz overclock icon on desktop..
