More actions
m (Text replacement - "|download=https://dlhb.gamebrew.org/dshomebrew/" to "|download=https://dlhb.gamebrew.org/dshomebrew2/") |
No edit summary |
||
| Line 8: | Line 8: | ||
|version=0.1 alpha | |version=0.1 alpha | ||
|license=Mixed | |license=Mixed | ||
|download=https://dlhb.gamebrew.org/dshomebrew2/ | |download=https://dlhb.gamebrew.org/dshomebrew2/impulseds_v0.1_alpha.rar | ||
|website=https://www.rajveer.co.uk/impulseDS.html | |website=https://www.rajveer.co.uk/impulseDS.html | ||
}} | }} | ||
Latest revision as of 13:19, 20 August 2024
| ImpulseDS | |
|---|---|
 | |
| General | |
| Author | Rajveer |
| Type | Racing |
| Version | 0.1 alpha |
| License | Mixed |
| Last Updated | 2013/08/20 |
| Links | |
| Download | |
| Website | |
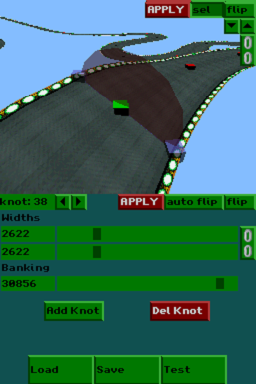
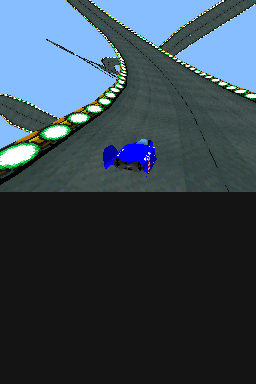
ImpulseDS is a Nintendo DS racing game inspired by F-Zero X. It also includes a track editor, allowing you to test tracks you've created.
It was participated in the NEO Retro Coding Compo 2013 (Game).
Installation
ImpulseDS uses libfat, if your flash cart doesn't support automatic DLDI patching then please patch it with the correct driver.
To install, place the ImpulseDS.nds binary on your flash cart. Put the ImpulseDS folder any in one of 3 places:
- In /data/.
- The root of the flash cart.
- The same folder as the .nds binary.
User guide
Track Editor
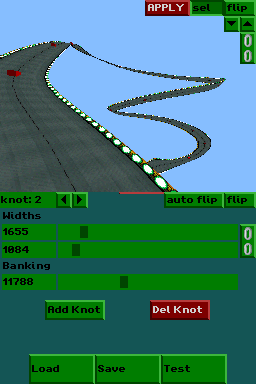
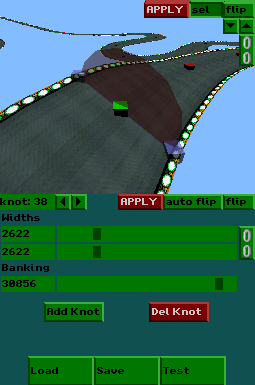
A track is made up of a set of knots which can be moved, rotated and resized.
Flipping between interfaces:
- To flip between the main GUI and the 3D display, click the flip button in the top right corner of the touchscreen.
Navigating the 3D view:
- Click and drag on the view to rotate.
- Use D-Pad to move, L/R to move the camera up and right.
- Up/down movement can also be done by holding the up/down arrow buttons on the 3D display (second row of buttons).
- A to switch rendering between track surface and track line mode.
Moving knots:
- Ensure that the 3D display is on the touchscreen and that the mode selector button (top row, second button) is set to move.
- Click and drag one of the red boxes representing the knot on the track:
- The knot will turn green whilst dragging.
- The track will recreate when the knot is released (can takes a few seconds on the DS so please be patient).
Selecting knots:
- Ensure that the 3D display is on the touchscreen and that the mode selector button (top row, second button) is set to Sel.
- Click on one of the red boxes representing the knot on the track, the knot will turn green when selected.
- If Auto Flip is enabled, selecting a knot in the 3D display will automatically flip the GUI to the touchscreen.
- Knots can also be selected using the left/right arrow buttons on the GUI display (top left corner).
Resizing knot widths:
- Once a knot has been selected, it can be resized in both the GUI and 3D displays.
- To resize the knot's widths in the GUI display, drag one of the width sliders.
- To resize the knot's widths in the 3D display, click on one of the blue boxes that appears next to the selected knot and drag it.
- Knots can be resized together if the chain toggle button is enabled. This is the button to the right of width sliders in the GUI view, and the button in the same position in the 3D view.
- Click the Apply button to apply the changes (can takes a few seconds on the DS so please be patient).
- Reselecting the knot in the 3D view or selecting the knot id label in the GUI view (top-left) will remove any changes.
Rotating knots:
- Once a knot has been selected, it can be rotated in both the GUI and 3D displays.
- To rotate the knot in the GUI display, drag the banking slider.
- To rotate the knot in the 3D display, click and drag the red circle that appears around the selected knot.
- Click the Apply button to apply the changes (can takes a few seconds on the DS so please be patient).
- Reselecting the knot in the 3D view or selecting the knot id label in the GUI view (top-left) will remove any changes.
Adding and removing knots:
- Add Knot button will create a new knot AFTER the selected knot.
- Delete Knot button will delete the currently selected knot.
- This process takes a few seconds on the DS so please be patient.
Saving the track:
- Click the Save button on the GUI display.
- The current name of the track will be autofilled. Click the red button on the right of the keyboard to overwrite the track, or edit the name before saving to save a new version.
- Press the Esc button on the keyboard to cancel saving.
- The track named default cannot be saved over.
Loading a track:
- Click the Load button on the GUI display.
- Scroll the list and then click on the track name to load (don't scroll too fast or it can get bugged).
- Currently the list doesn't show your current position, so scroll until you cannot anymore.
Testing a track:
- Clicking on the Test button will take the user into game mode, where you can test the current track.
Game mode
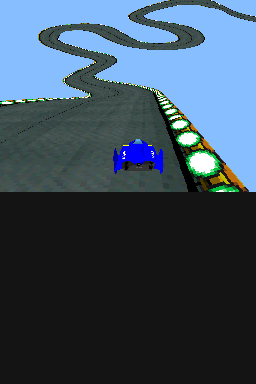
Currently the game is in a basic state, however it is complete-enough to test out the track.
At the moment controls are hard-coded, and have 2 setups which are enabled at the same time (Button and Touch).
Controls
Button:
A - Accelerate
B - Brake
Left/Right - Turning
Touch:
Up/X - Accelerate
Down/B - Brake
Tap and drag - Turn the vehicle
Start - Exit the game and return to the track editor
Screenshots
Known issues
While loading the list of race tracks, don't scroll the list too fast as a bug prevents redrawing list elements.
Changelog
v0.1 alpha
- First version, includes the basics of both the track editor and racing game.
Credits
Special thanks to:
- ant512 for WoopsiGfx and also help setting up the PC-side.
- SausageBoy for his TexMex texture converter.
- WinterMute and the guys behind devkitPro.
- Guy_Perfect from fzerocentral.org for help explaining parts of his F-Zero Execution Project level editor.
- gbadev.org for the help.
External links
- Author's website - https://www.rajveer.co.uk/impulseDS.html (archived)
- NeoFlash - https://www.neoflash.com/forum/index.php?topic=7673.0 (archived)
