More actions
m (Text replacement - "|discussion=" to "|donation=") |
No edit summary |
||
| Line 8: | Line 8: | ||
|version=1.1 | |version=1.1 | ||
|license=Mixed | |license=Mixed | ||
|download=https://dlhb.gamebrew.org/vitahomebrews/ | |download=https://dlhb.gamebrew.org/vitahomebrews/adr.bubble.helper.zip | ||
|website=https://github.com/AntHJ/Adrenaline-Bubble-helper | |website=https://github.com/AntHJ/Adrenaline-Bubble-helper | ||
|source=https://github.com/AntHJ/Adrenaline-Bubble-helper | |source=https://github.com/AntHJ/Adrenaline-Bubble-helper | ||
}} | }} | ||
{{#seo: | {{#seo: | ||
Latest revision as of 07:18, 4 August 2024
| Adrenaline Bubble Helper | |
|---|---|
 | |
| General | |
| Author | AntHJ |
| Type | Bubble Makers |
| Version | 1.1 |
| License | Mixed |
| Last Updated | 2021/05/27 |
| Links | |
| Download | |
| Website | |
| Source | |
Adrenaline Bubble Helper is a tool developed by AntHJ.
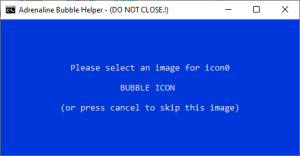
This tool will resize images to the required sizes for the Adrenaline Bubble Manager and convert them to 8-bit PNG images.
User guide
For best results, try and use images of a similar size/ratio for its use:
- Bubble - 128 x 128
- Background - 840 x 500
- Start Button - 280 x 158
- Launch Screen - 960 x 544
- Manual pages / Additional images - 960 x 544
The location of the Start/Launch button can be changed from the default location. The options are:
- Middle - The same location as the Settings app.
- Right - The same location as VitaShell.
- Upper Right - The same location as the NEAR app.
Transfer the files
After resizing and converting the images using the tool, transfer the created folder and converted images to your Vita's UX0 directory. The directory structure should look like this:
ux0:ABM\MyGame\icon0.png
              \bg0.png
              \startup.png
              \pic0.png
              \template.xml
              \Manual\001.png
                     \002.png
                     \003.png
Install/inject the images
- Open Adrenaline bubble manager.
- Create a bubble like you normally do (to remove the PS1/PSP background on launch, set the option Set Img to "No" before making the original bubble).
- Press Circle to open Bubbles Settings.
- Scroll down to find the Game/Bubble you want to change.
- Press Cross then find the Folder for the image set and press X.
- Press Start and the app will use these files to rebuild the bubble.
Screenshots


Changelog
v1.1
- This tool will resize images to the required sizes for the Adrenaline Bubble Manager and also convert them to 8 bit png images.
- Once you have created your custom bubbles, these can be used in the Adrenaline Bubble Manager.
