More actions
No edit summary |
No edit summary |
||
| Line 52: | Line 52: | ||
==Screenshots== | ==Screenshots== | ||
retroarchbubblebuildervita3.png | https://dlhb.gamebrew.org/vitahomebrews/retroarchbubblebuildervita3.png | ||
retroarchbubblebuildervita4.png | https://dlhb.gamebrew.org/vitahomebrews/retroarchbubblebuildervita4.png | ||
retroarchbubblebuildervita5.png | https://dlhb.gamebrew.org/vitahomebrews/retroarchbubblebuildervita5.png | ||
retroarchbubblebuildervita6.png | https://dlhb.gamebrew.org/vitahomebrews/retroarchbubblebuildervita6.png | ||
https://dlhb.gamebrew.org/vitahomebrews/retroarchbubblebuildervita7.png | |||
https://dlhb.gamebrew.org/vitahomebrews/retroarchbubblebuildervita8.png | |||
==Media== | ==Media== | ||
Revision as of 09:06, 14 December 2022
| Retroarch Bubble Builder | |
|---|---|
 | |
| General | |
| Author | AntHJ |
| Type | Utilities |
| Version | 1.0 |
| License | Mixed |
| Last Updated | 2021/11/19 |
| Links | |
| Download | |
| Website | |
| Source | |
With this tool you are able to load your own images and resize them to make your own bubble and launch page.
If your using older verions of Retroarch where the shortcut feature wasn't included, this app can also make your Retroarch compatible with the bubble shortcuts.
This homebrew utilises Lua Player Plus Vita (lpp-vita).
User guide
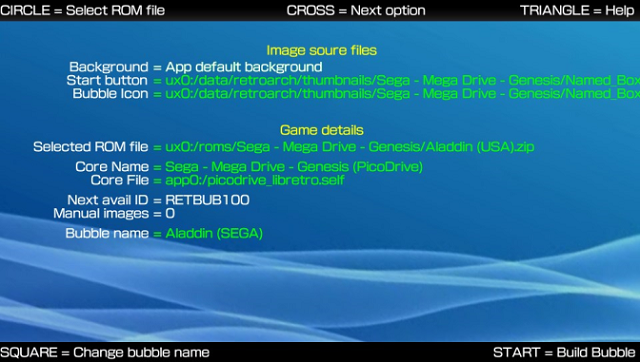
The first page is the summary of your bubbles details:
- This includes the selected Rom file, the core it will use, the BubbleID and its name on the LiveAena.
- You can press left and right on the D-Pad to manually select a core if needed.
- Cores that are included in your current Retroarch install will be green, any you don't have will be red.
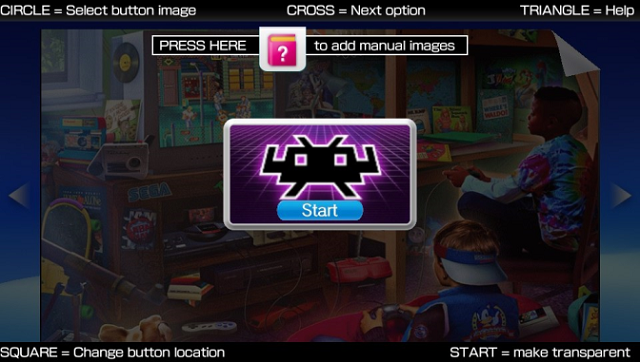
The next 2 screens are the template area:
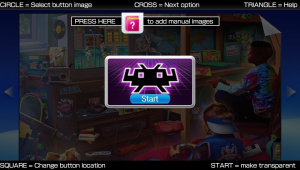
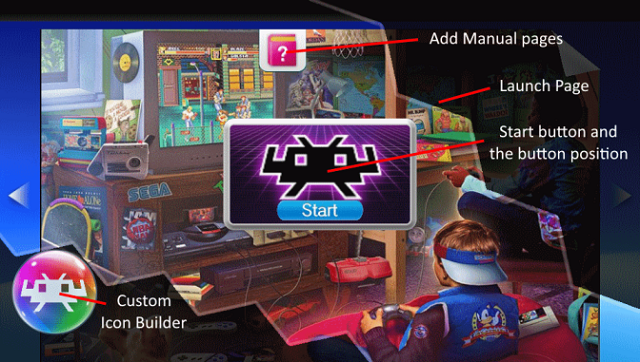
- You can load, resize your images into the template area to add your custom launch page background image and the Start button.
- The Start button can be moved into 1 of 3 positions, or by pressing Start it will use the background image giving it the illusion of being transparent.
- From the button page you also have the ability of adding manual images (optional).
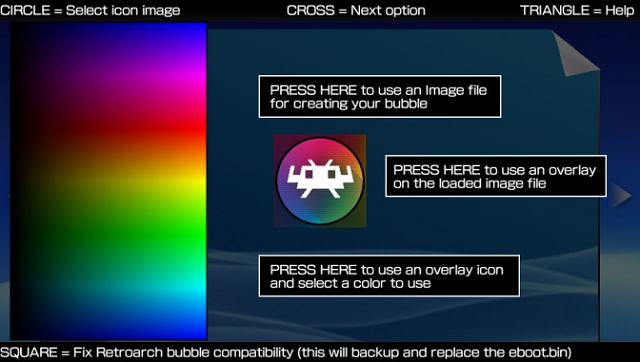
The last of the edit pages is for the Bubble itself, where you can:
- Load an image file and resize it for the template.
- Add the overlay if needed.
- Select a color from the box and make a custom color button.
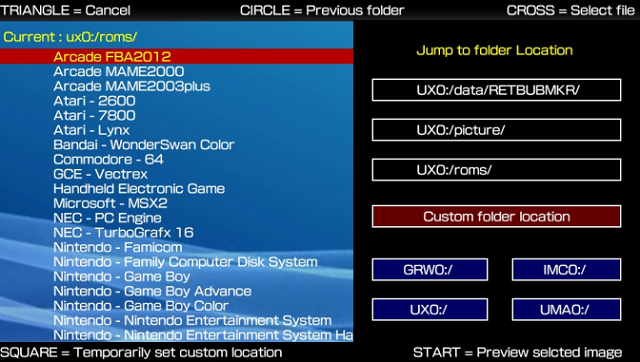
File selection screen:
- This offers you some shortcuts to help locate your files.
- You can set it to remember a temporary custom folder for quicker access to your chosen folder.
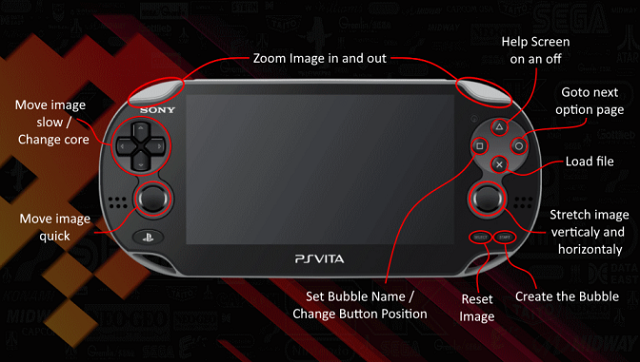
Help page:
- It shows you roughly how to use the controls, but there are also prompts on each screen to help you along the way just in case you need them.
Once you have finished editing, you can press Start on the summary page and your bubble will be created and installed.
You may get Image loading errors due to limitations in LUA, try to use smaller resolution files to avoid crashing.
Screenshots
Media
PS Vita Homebrew: Retroarch Bubble Builder v1.0 - January 2022 (Robles Junior)
