More actions
m (Text replacement - "GameBrew!" to "GameBrew") |
m (Text replacement - "https://vitadb.rinnegatamante.it/" to "https://www.rinnegatamante.eu/vitadb/") |
||
| (5 intermediate revisions by the same user not shown) | |||
| Line 2: | Line 2: | ||
|title=Vita Homebrew PC Tools (PC Utilities) - GameBrew | |title=Vita Homebrew PC Tools (PC Utilities) - GameBrew | ||
|title_mode=append | |title_mode=append | ||
|image= | |image=sd2vitahelpertool2.png | ||
|image_alt=SD2Vita Helper Tool | |image_alt=SD2Vita Helper Tool | ||
}} | }} | ||
{{Infobox Vita Homebrews | {{Infobox Vita Homebrews | ||
|title=SD2Vita Helper Tool | |title=SD2Vita Helper Tool | ||
|image= | |image=sd2vitahelpertool2.png | ||
|description=zzBlank | |description=Properly zzBlank and Format your SD card with the correct allocation and file system . This may also detect fake SD cards. | ||
|author=AntHJ | |author=AntHJ | ||
|lastupdated=2021/07/13 | |lastupdated=2021/07/13 | ||
| Line 14: | Line 14: | ||
|version=1.2 | |version=1.2 | ||
|license=Mixed | |license=Mixed | ||
|download=https://dlhb.gamebrew.org/vitahomebrews/ | |download=https://dlhb.gamebrew.org/vitahomebrews/sd2vitahelpertool.7z | ||
|website=https://github.com/AntHJ/SD2Vita-Format-Tool | |website=https://github.com/AntHJ/SD2Vita-Format-Tool | ||
|source= | |source= | ||
}} | }} | ||
SD2Vita Format Tool/SD2Vita Helper Tool was designed to quickly and easily flash the zzBlank.img to you SD, check its reported capacity and potentially spot fake SD cards. It will then automatically format the correct file allocation size ready for use in the SD2Vita. | |||
Once the card has formatted, the tool can link to your Vita through USB and copy the contents of ux0 making it simple to upgrade your SD size or start fresh. (Lite version has the clone option removed.) | |||
== | ==User guide== | ||
The automated process: | |||
* Format Stage 1 initially blanks and renames the card. | |||
* the zzBlank.img then gets flashed to remove partitions. | |||
* Format Stage 2 creates the exFat partition. | |||
===Running the tool=== | |||
Right click the SD2Vita Format Tool.bat file. | |||
== Using the | Select "Run as administrator" (if you get a security warning, click more info, Run anyway). | ||
Select the location of the SD card you wish to blank | |||
===Using the tool=== | |||
Select the location of the SD card you wish to blank. After selecting a drive a box will then show with details about your card, again make sure that the information shown represents the card you wish to blank/format. | |||
If your card flags as fake, beware if you decide to continue, this could just be a miss calculation but as a rule, a genuine SD card should be 93% of there printed size. so for example: | If your card flags as fake, beware if you decide to continue, this could just be a miss calculation but as a rule, a genuine SD card should be 93% of there printed size. so for example: | ||
*128gb - Shows as between 116gb > 119gb. | |||
*256gb - Shows as aroud 238gb. | |||
*400gb - Shows as around 372gb. | |||
*515gb - Shows as around 476gb. | |||
Once confirmed, the automated process begins. it will temporarily format the SD as a standard card and change its label. | |||
Next the zzBlank.img will be flashed to clear all previous partitions, then it will determine which file allocation size it needs and formats accordingly. | |||
Once the card has been prepared you will be asked if you would like to Clone the current Vita setup, you could just select NO and the app will will close. You would now need to make a backup of UX0 onto the SD. | Once the card has been prepared you will be asked if you would like to Clone the current Vita setup, you could just select NO and the app will will close. You would now need to make a backup of UX0 onto the SD. | ||
(Your SD card will need a copy of the Vitas UX0 drive, otherwise it will not boot up correctly and you may get stuck in a boot loop. If this happens, hold the L bumper as the system starts to boot from the original storage instead.) | |||
===Clone/Upgrade an existing setup=== | |||
If you select YES and decide to clone/upgrade your current system setup you will need to prepare the Vita itself for the transfer. | |||
Launch the [[VitaShell]] app, press the Start button and make sure USB Mode is set to the main storage. | |||
* Memory Card if you are using the Sony memory. | |||
* sd2vita if you currently have an sd2vita already running (i.e. Upgrade). | |||
* psvsd if you are using a USB device or psvsd adaptor. | |||
== | Press Start again to confirm the settings, then press Select to start the USB Link. | ||
Press Yes/OK on the computer to start the transfer process. | |||
After the files have copied, you can use [[StorageMgr_Vita|StorageMgr]] / [[YAMT Vita]] / [[Autoplugin 2 Vita|Autoplugin 2]] to change the drive allocations. Here is a brief setup guide: | |||
For [[StorageMgr_Vita|StorageMgr]]: | |||
*Install the plugin following [https://vita.hacks.guide/storagemgr.html#section-i-installing-plugins the instructions]. | |||
*Edit ur0:tai/storage_config.txt to fit your situation as instructed in the README, example from [https://vita.hacks.guide/storagemgr.html#what-you-need Vita Hacks Guide]: | |||
**MCD=uma0 should be kept as-is if you plan to keep a Sony memory card in your device, and removed otherwise. | |||
**INT=imc0 should be kept as-is for PS Vita 2000 and PS TV users, and removed for PS Vita 1000 users. | |||
**GCD=ux0 should be kept as-is for SD2Vita users, and edited to UMA=ux0 for USB drive and psvsd users. | |||
**UMA=grw0 should be removed unless you have multiple storage devices (in which case the device which is not assigned to ux0: should be assigned to grw0:). | |||
== | For [[Autoplugin 2 Vita|Autoplugin 2]]: | ||
* Launch Autoplugin 2, go to the Vita plugins section and the sd2vita settings page. | |||
* Change the drive allocations to MCD=NONE, INT=NONE, GCD=UX0, UMA=NONE. | |||
** If you are using a psvsd or usb device then swap GCD=NONE to none and UMA to UX0. | |||
** If you want to use your Sony memory card as additional storage, set MCD=UMA0. | |||
* Select save the goto exit for it to reboot the vita. | |||
Reboot and go to Settings - System Information and confirm the SD card size. | |||
==Screenshots== | |||
https://dlhb.gamebrew.org/vitahomebrews/sd2vitahelpertool3.png | |||
https://dlhb.gamebrew.org/vitahomebrews/sd2vitahelpertool4.png | |||
https://dlhb.gamebrew.org/vitahomebrews/sd2vitahelpertool5.png | |||
https://dlhb.gamebrew.org/vitahomebrews/sd2vitahelpertool6.png | |||
==Media== | |||
'''SD2Vita Helper - Prepare your SD Card and Clone your Vita''' ([https://www.youtube.com/watch?v=Jl2xDIVG-co Modders Help]) <br> | |||
<youtube>Jl2xDIVG-co</youtube> | |||
==Changelog== | ==Changelog== | ||
''' | '''v1.2''' | ||
* | * Lite version has the clone option removed. | ||
== External links == | == External links == | ||
* | * GitHub - https://github.com/AntHJ/SD2Vita-Format-Tool | ||
* VitaDB - https:// | * VitaDB - https://www.rinnegatamante.eu/vitadb/#/info/707 | ||
Latest revision as of 04:38, 5 January 2025
| SD2Vita Helper Tool | |
|---|---|
 | |
| General | |
| Author | AntHJ |
| Type | PC Utilities |
| Version | 1.2 |
| License | Mixed |
| Last Updated | 2021/07/13 |
| Links | |
| Download | |
| Website | |
SD2Vita Format Tool/SD2Vita Helper Tool was designed to quickly and easily flash the zzBlank.img to you SD, check its reported capacity and potentially spot fake SD cards. It will then automatically format the correct file allocation size ready for use in the SD2Vita.
Once the card has formatted, the tool can link to your Vita through USB and copy the contents of ux0 making it simple to upgrade your SD size or start fresh. (Lite version has the clone option removed.)
User guide
The automated process:
- Format Stage 1 initially blanks and renames the card.
- the zzBlank.img then gets flashed to remove partitions.
- Format Stage 2 creates the exFat partition.
Running the tool
Right click the SD2Vita Format Tool.bat file.
Select "Run as administrator" (if you get a security warning, click more info, Run anyway).
Using the tool
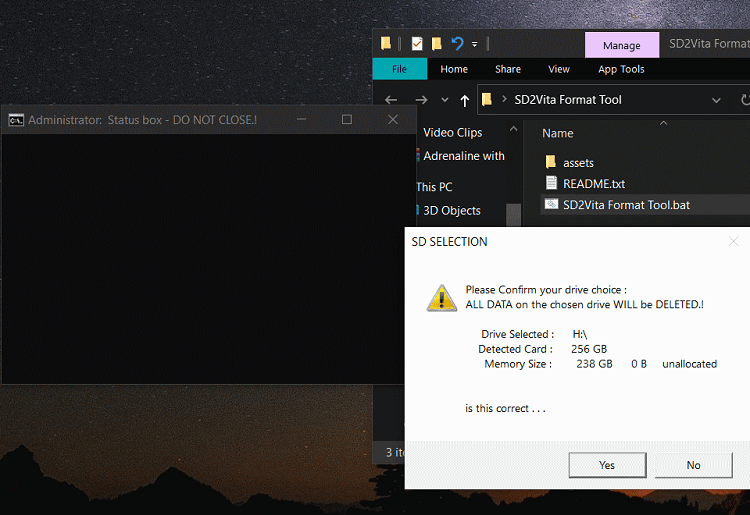
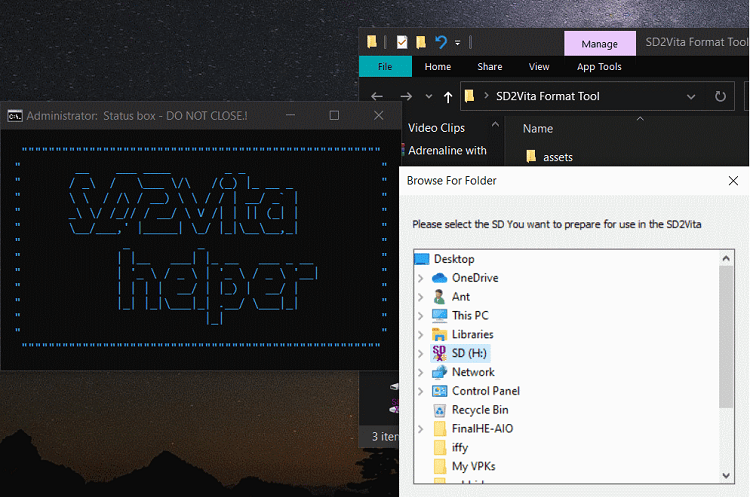
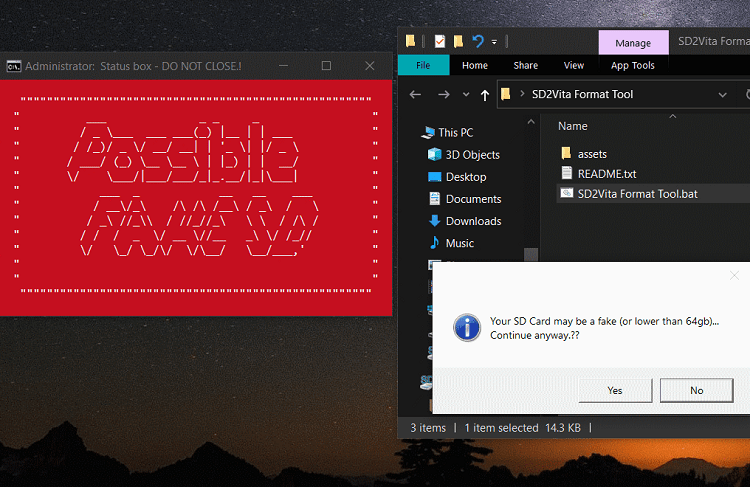
Select the location of the SD card you wish to blank. After selecting a drive a box will then show with details about your card, again make sure that the information shown represents the card you wish to blank/format.
If your card flags as fake, beware if you decide to continue, this could just be a miss calculation but as a rule, a genuine SD card should be 93% of there printed size. so for example:
- 128gb - Shows as between 116gb > 119gb.
- 256gb - Shows as aroud 238gb.
- 400gb - Shows as around 372gb.
- 515gb - Shows as around 476gb.
Once confirmed, the automated process begins. it will temporarily format the SD as a standard card and change its label.
Next the zzBlank.img will be flashed to clear all previous partitions, then it will determine which file allocation size it needs and formats accordingly.
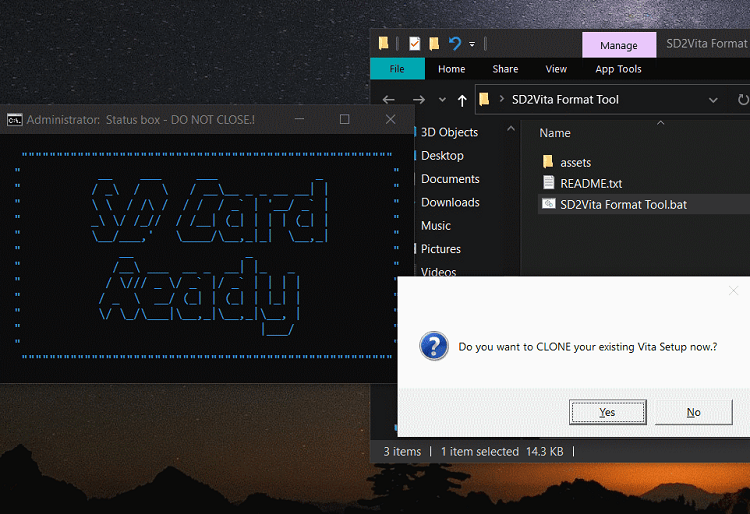
Once the card has been prepared you will be asked if you would like to Clone the current Vita setup, you could just select NO and the app will will close. You would now need to make a backup of UX0 onto the SD.
(Your SD card will need a copy of the Vitas UX0 drive, otherwise it will not boot up correctly and you may get stuck in a boot loop. If this happens, hold the L bumper as the system starts to boot from the original storage instead.)
Clone/Upgrade an existing setup
If you select YES and decide to clone/upgrade your current system setup you will need to prepare the Vita itself for the transfer.
Launch the VitaShell app, press the Start button and make sure USB Mode is set to the main storage.
- Memory Card if you are using the Sony memory.
- sd2vita if you currently have an sd2vita already running (i.e. Upgrade).
- psvsd if you are using a USB device or psvsd adaptor.
Press Start again to confirm the settings, then press Select to start the USB Link.
Press Yes/OK on the computer to start the transfer process.
After the files have copied, you can use StorageMgr / YAMT Vita / Autoplugin 2 to change the drive allocations. Here is a brief setup guide:
For StorageMgr:
- Install the plugin following the instructions.
- Edit ur0:tai/storage_config.txt to fit your situation as instructed in the README, example from Vita Hacks Guide:
- MCD=uma0 should be kept as-is if you plan to keep a Sony memory card in your device, and removed otherwise.
- INT=imc0 should be kept as-is for PS Vita 2000 and PS TV users, and removed for PS Vita 1000 users.
- GCD=ux0 should be kept as-is for SD2Vita users, and edited to UMA=ux0 for USB drive and psvsd users.
- UMA=grw0 should be removed unless you have multiple storage devices (in which case the device which is not assigned to ux0: should be assigned to grw0:).
For Autoplugin 2:
- Launch Autoplugin 2, go to the Vita plugins section and the sd2vita settings page.
- Change the drive allocations to MCD=NONE, INT=NONE, GCD=UX0, UMA=NONE.
- If you are using a psvsd or usb device then swap GCD=NONE to none and UMA to UX0.
- If you want to use your Sony memory card as additional storage, set MCD=UMA0.
- Select save the goto exit for it to reboot the vita.
Reboot and go to Settings - System Information and confirm the SD card size.
Screenshots
Media
SD2Vita Helper - Prepare your SD Card and Clone your Vita (Modders Help)
Changelog
v1.2
- Lite version has the clone option removed.
