More actions
No edit summary |
No edit summary |
||
| (2 intermediate revisions by the same user not shown) | |||
| Line 37: | Line 37: | ||
===Creating a backup=== | ===Creating a backup=== | ||
* Open the psp2etoi app. After accepting the disclaimer it will perform a selftest. | * Open the "psp2etoi" app. After accepting the disclaimer it will perform a selftest. | ||
* Select "Backup the current Unique...". It will create a backup of encrypted ConsoleID and OpenPSID. | * Select "Backup the current Unique...". It will create a backup of encrypted ConsoleID and OpenPSID. | ||
* Select "Dump the current device...". It will create a backup of the current device configuration and S/NVS. | * Select "Dump the current device...". It will create a backup of the current device configuration and S/NVS. | ||
| Line 51: | Line 51: | ||
* Clean the <code>ux0:data/psp2etoi/</code> directory. | * Clean the <code>ux0:data/psp2etoi/</code> directory. | ||
* Place a configuration file as <code>ux0:data/psp2etoi/input.req</code>. | * Place a configuration file as <code>ux0:data/psp2etoi/input.req</code>. | ||
** This configuration will serve as a | ** This configuration will serve as a "template" for the custom configuration. | ||
** The configuration must have the <code>INPUT</code> tag set to <code>false</code>. | ** The configuration must have the <code>INPUT</code> tag set to <code>false</code>. | ||
* Open the | * Open the "psp2etoi" app. After accepting the disclaimer it will perform a selftest. | ||
* Select "Create a custom...". It will parse the template and generate a matching configuration. | * Select "Create a custom...". It will parse the template and generate a matching configuration. | ||
* The custom configuration can be found in <code>ux0:data/psp2etoi/custom_input.cfg</code>. | * The custom configuration can be found in <code>ux0:data/psp2etoi/custom_input.cfg</code>. | ||
| Line 62: | Line 62: | ||
** If the configuration requires supplementary files put them there too. | ** If the configuration requires supplementary files put them there too. | ||
** The input configuration must have the <code>INPUT</code> tag set to <code>true</code>. | ** The input configuration must have the <code>INPUT</code> tag set to <code>true</code>. | ||
* Open the | * Open the "psp2etoi" app. After accepting the disclaimer it will perform a selftest. | ||
* Select "Apply a custom...". It will parse the configuration file and show expected changes. | * Select "Apply a custom...". It will parse the configuration file and show expected changes. | ||
* After confirming that the changes are correct press triangle to write the new configuration. | * After confirming that the changes are correct press triangle to write the new configuration. | ||
| Line 69: | Line 69: | ||
** They can be used to revert changes made by the <code>input.cfg</code>. | ** They can be used to revert changes made by the <code>input.cfg</code>. | ||
=== | ===Notes=== | ||
* It is extremely easy to permanently "brick" your console using this tool, so be cautious. | * It is extremely easy to permanently "brick" your console using this tool, so be cautious. | ||
* You should only use this tool having understood how writing the desired configuration data impacts the device | * You should only use this tool having understood how writing the desired configuration data impacts the device | ||
| Line 78: | Line 78: | ||
{| style="width: 80%; margin-left:0em;" | {| style="width: 80%; margin-left:0em;" | ||
| | | | ||
https://dlhb.gamebrew.org/vitahomebrews/psp2etoivita-02.png | https://dlhb.gamebrew.org/vitahomebrews/psp2etoivita-02.png | ||
https://dlhb.gamebrew.org/vitahomebrews/psp2etoivita-03.png | https://dlhb.gamebrew.org/vitahomebrews/psp2etoivita-03.png | ||
Latest revision as of 11:44, 20 August 2023
| psp2etoi | |
|---|---|
 | |
| General | |
| Author | SKGleba |
| Type | System Tools |
| Version | 1.0.0 |
| License | MIT License |
| Last Updated | 2023/07/14 |
| Links | |
| Download | |
| Website | |
| Source | |
This tool allows you to backup or edit the Unique Device Identifiers - ConsoleID and OpenPSID.
The utility is also capable of dumping or flashing the syscon S/NVS that contains configuration data such as QA flags, management flags, boot flags and much more.
Note: This tool is intended for advanced users only; a wrong configuration or program bug can lead to unrecoverable system corruption requiring a motherboard replacement.
User guide
Prerequisites
Recommended:
- The target Playstation Vita/TV console should be running release firmware version 3.65 of type CEX/DEX/TOOL/CFT.
- As a form of recovery the console should have enso_ex v5.0 installed and running.
Required:
- The target Playstation Vita/TV console must be running firmware version between (including) 3.60 and 3.74.
- The console must have the taihenkaku CFW framework installed and running.
- The psp2etoi.vpk app package should be installed via VitaShell.
Creating a backup
- Open the "psp2etoi" app. After accepting the disclaimer it will perform a selftest.
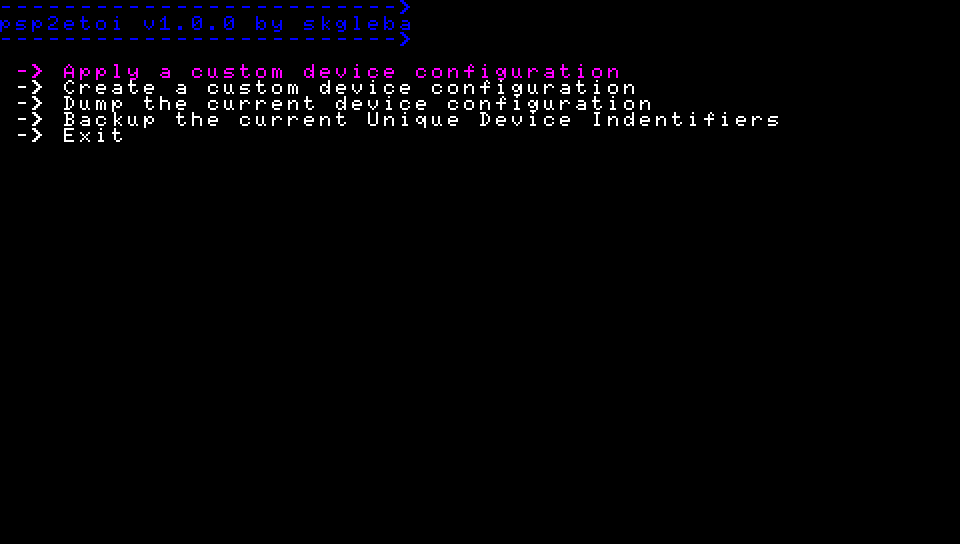
- Select "Backup the current Unique...". It will create a backup of encrypted ConsoleID and OpenPSID.
- Select "Dump the current device...". It will create a backup of the current device configuration and S/NVS.
- Copy out the backup files from
ux0:data/psp2etoi/. Store them in multiple copies on separate storages.udi.binis the ConsoleID and OpenPSID in an encrypted format that can be directly written to idstorage.output.cfgis a psp2etoi configuration file containing all data that psp2etoi can modify.nvs.binis a dump of the console's S/NVS.
Writing a custom configuration
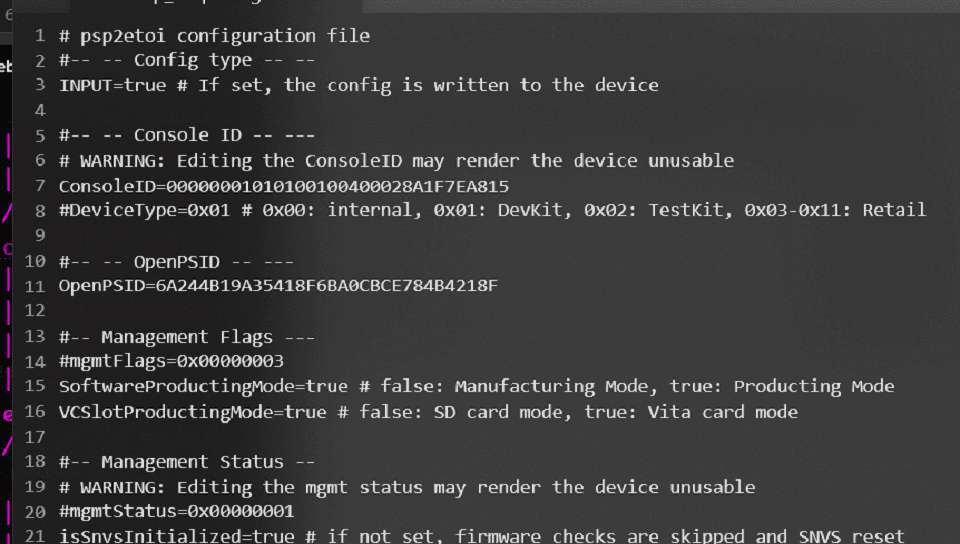
- Refer to the configuration manual.
Creating a custom configuration via psp2etoi
- Clean the
ux0:data/psp2etoi/directory. - Place a configuration file as
ux0:data/psp2etoi/input.req.- This configuration will serve as a "template" for the custom configuration.
- The configuration must have the
INPUTtag set tofalse.
- Open the "psp2etoi" app. After accepting the disclaimer it will perform a selftest.
- Select "Create a custom...". It will parse the template and generate a matching configuration.
- The custom configuration can be found in
ux0:data/psp2etoi/custom_input.cfg.
Installing a psp2etoi configuration
- Clean the
ux0:data/psp2etoi/directory. - Place the input configuration file as
ux0:data/psp2etoi/input.cfg.- If the configuration requires supplementary files put them there too.
- The input configuration must have the
INPUTtag set totrue.
- Open the "psp2etoi" app. After accepting the disclaimer it will perform a selftest.
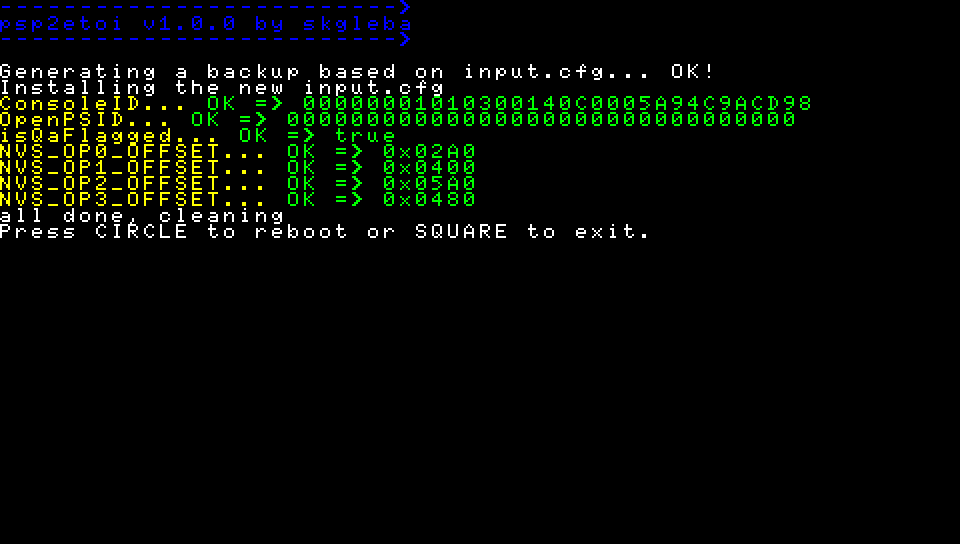
- Select "Apply a custom...". It will parse the configuration file and show expected changes.
- After confirming that the changes are correct press triangle to write the new configuration.
- A backup configuration file based on the input configuration will be written to
backup_input.cfg.
- A backup configuration file based on the input configuration will be written to
- You should copy out the
backup_files and store them in multiple copies on separate storages.- They can be used to revert changes made by the
input.cfg.
- They can be used to revert changes made by the
Notes
- It is extremely easy to permanently "brick" your console using this tool, so be cautious.
- You should only use this tool having understood how writing the desired configuration data impacts the device
- Always double-check the input configuration file and the app's parser output before applying changes.
- Bad ConsoleID type/sub-code should be recoverable with enso_ex v5, provided you have the backed-up
udi.bin.
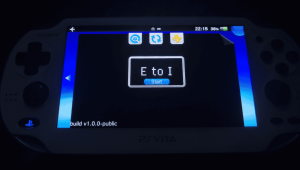
Screenshots
|
|
Changelog
v1.0
- First Release.
Credits
- Team Molecule for taihenkaku, enso and the update_sm cmd 0x50002 heap overflow.
- Princess-Of-Sleeping for help and various insights.
- All the anonymous friends that tested psp2etoi on their devkits.
- Henkaku wiki contributors.


