More actions
m (Text replacement - "GameBrew!" to "GameBrew") |
No edit summary |
||
| (7 intermediate revisions by one other user not shown) | |||
| Line 1: | Line 1: | ||
{{Infobox Vita Homebrews | {{Infobox Vita Homebrews | ||
|title=UX0 to SD CloneTool | |title=UX0 to SD CloneTool | ||
|image= | |image=ux0tosdclonetoolvita2.png | ||
|description=Tool that semi-automates migration to an SD. | |description=Tool that semi-automates migration to an SD. | ||
|author=AntHJ | |author=AntHJ | ||
|lastupdated= | |lastupdated=2025/05/03 | ||
|type=Utilities | |type=Utilities | ||
|version=2. | |version=2.3b | ||
|license=Mixed | |license=Mixed | ||
|download=https://dlhb.gamebrew.org/vitahomebrews/ux0tosdclonetoolvita.7z | |download=https://dlhb.gamebrew.org/vitahomebrews/ux0tosdclonetoolvita.7z | ||
|website= | |website=https://vitadb.rinnegatamante.it/#/info/724 | ||
|source=https://github.com/AntHJ/UX0toSD | |source=https://github.com/AntHJ/UX0toSD | ||
}} | }} | ||
{{#seo: | |||
|title=Vita Homebrew Apps (Utilities) - GameBrew | |||
|title_mode=append | |||
|image=ux0tosdclonetoolvita2.png | |||
|image_alt=UX0 to SD CloneTool | |||
}} | |||
UX0-to-SD is a simple to use tool designed to semi-automate the SD migration process. | |||
It will assign your memory allocations, and clone your Sony memory to the SD. Works with SD2Vita, PSVSD and USB on PSTVs and Vitas. | |||
Created using [[Lua Player Plus Vita]] (lpp-vita). | |||
==User guide== | |||
===How to use=== | |||
Run the tool the 1st time and select which adaptor you are setting up. | |||
The app will remove and previous attempts to setup your SD and then set the card as a secondary storage drive (grw0:) and reboot the system. | |||
Once rebooted, just run the app a 2nd time to start the data transfer stage. | |||
If for some reason you see an error detecting your card then the possible issues could be: | |||
* Fake or Faulty SD card. (this is most commonly the main issue) | |||
* You could have a faulty adaptor. (the SD2Vita adaptors are fragile) | |||
* The SD card wasn't properly zzBlanked or formatted. (also quite common) | |||
After all the data has copied from your current UX0 (the Sony memory) to the card the app will then set your SD as the primary storage and set the Sony memory card (if applicable) as a secondary storage (uma0:). | After all the data has copied from your current UX0 (the Sony memory) to the card the app will then set your SD as the primary storage and set the Sony memory card (if applicable) as a secondary storage (uma0:). This is only really useful if you have a good size Sony card, you can remove the Sony card and put it safely away just in case its needed in the future. | ||
Finally, after the system reboots again with the new allocations and newly copied SD you can go into Setting | Finally, after the system reboots again with the new allocations and newly copied SD you can go into Setting > System > System information, you should now see your SD cards memory size (Capacity). Be aware - the size show is and should always be much smaller then the printed size (usually around 93%). | ||
Examples of good SD capacity: | |||
*128gb shows as between 116gb -> 119gb. | |||
*256gb shows as around 238gb. | |||
*400gb shows as around 372gb. | |||
*515gb shows as around 476gb. | |||
Note : | Note: Any SD cards showing higher values than these are most likely fake. | ||
== | ===Preparing the SD=== | ||
There are 2 methods for preparing your SD, through PC or on Vita using the app. | |||
'''PC Method:''' | |||
You can either unlock the additional tool in the app itself if your card is not detected, or manually download the SD.Toolkit [https://github.com/AntHJ/UX0toSD/releases/download/v2.1b/SD.toolkit.v2.zip -here-], otherwise there are other more recognised methods where basically you will flash a file named zzBlank.img using the Win32Diskimager software to the card then fornat it as exFat. | |||
If your SD is upto 128gb then format it with the file allocation as default but anything over 128gb NEEDS to be format at 64k or you card will waste space over time. | |||
The SD.Toolkit is the easiest of the 2 PC options but either is fine, the general reason for this is that the Vita needs to write data at the very beginning of the card to recognise properly and needs to be in the correct storage format, the file allocation size is a little tricky to explain but basically 64k makes the wasted spaces smaller. | |||
*For cards upto 128gb, use exFat and (default) file allocation. | |||
For cards over 128gb, use exFat at 64k file allocation | *For cards over 128gb, use exFat at 64k file allocation. | ||
'''On the Vita itself:''' | |||
The app had SKGleba's [[StorageFormat Vita|StorageFormat]] tool included that runs on the Vita itself that should properly format the SD, this is a much easier way of preparing your SD card. | |||
' | |||
But if your card is a fake and manages to format, you may not notice until you run into issues. | |||
==Screenshots== | |||
https://dlhb.gamebrew.org/vitahomebrews/ux0tosdclonetoolvita3.png | |||
https://dlhb.gamebrew.org/vitahomebrews/ux0tosdclonetoolvita4.png | |||
https://dlhb.gamebrew.org/vitahomebrews/ux0tosdclonetoolvita5.png | |||
https://dlhb.gamebrew.org/vitahomebrews/ux0tosdclonetoolvita6.png | |||
I have included my own FormatTool that runs on the PC to check, partition and properly format your SD card, this can also possibly detect fake SD cards | ==Changelog== | ||
'''v2.3b''' | |||
I have included SKGleba's StorageFormat tool that runs on the Vita itself to properly format the SD.. this is a much easier way of preparing your SD card BUT! if your card is a fake but manages to format, you may not notice until you run into issues. | * Fixed SD values for cards such as Samsung Evo Plus | ||
* App now grabs memory values from the git page | |||
'''v2.3''' | |||
* Fixed YAMT detection | |||
* Removed unnecessary items | |||
* Added basic SD Check and warning.. | |||
* (The app should now detect if your using a fake SD*) | |||
'''v2.1b''' | |||
*Quick and easy solution to setup your SD card allocations and automatically clone the UX0 to your card. | |||
*Compatible with SD2Vita, PSVSD and USB on PSTV and Vita consoles. | |||
** Run the app. | |||
** Select your storage device (system them reboots). | |||
** Run the app again. | |||
** The app should detects your SD and clones the current storage to the card, reboots again and you should now have your SD as your primary storage. | |||
* This now includes 2 options for preparing your SD. | |||
**I have included my own FormatTool that runs on the PC to check, partition and properly format your SD card, this can also possibly detect fake SD cards. | |||
**I have included SKGleba's StorageFormat tool that runs on the Vita itself to properly format the SD.. this is a much easier way of preparing your SD card BUT! if your card is a fake but manages to format, you may not notice until you run into issues. | |||
== External links == | ==External links== | ||
* | * GitHub - https://github.com/AntHJ/UX0toSD | ||
* VitaDB - https://vitadb.rinnegatamante.it/#/info/724 | * VitaDB - https://vitadb.rinnegatamante.it/#/info/724 | ||
Latest revision as of 02:12, 5 Mayıs 2024
| UX0 to SD CloneTool | |
|---|---|
 | |
| General | |
| Author | AntHJ |
| Type | Utilities |
| Version | 2.3b |
| License | Mixed |
| Last Updated | 2025/05/03 |
| Links | |
| Download | |
| Website | |
| Source | |
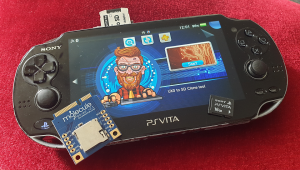
UX0-to-SD is a simple to use tool designed to semi-automate the SD migration process.
It will assign your memory allocations, and clone your Sony memory to the SD. Works with SD2Vita, PSVSD and USB on PSTVs and Vitas.
Created using Lua Player Plus Vita (lpp-vita).
User guide
How to use
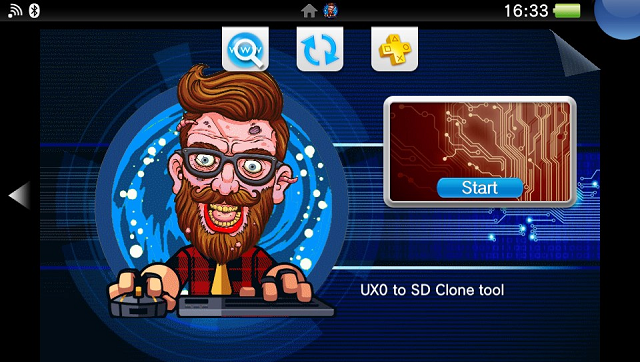
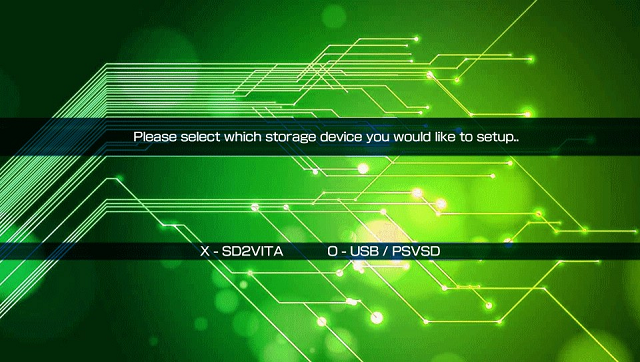
Run the tool the 1st time and select which adaptor you are setting up.
The app will remove and previous attempts to setup your SD and then set the card as a secondary storage drive (grw0:) and reboot the system.
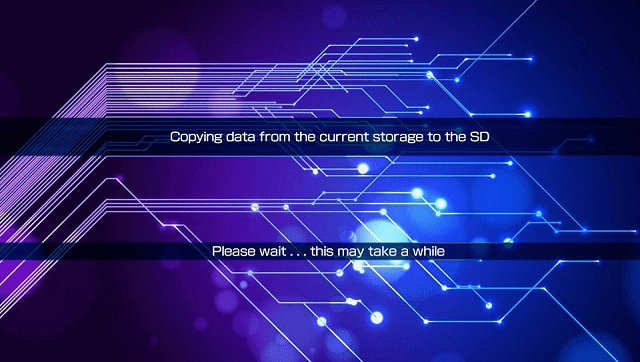
Once rebooted, just run the app a 2nd time to start the data transfer stage.
If for some reason you see an error detecting your card then the possible issues could be:
- Fake or Faulty SD card. (this is most commonly the main issue)
- You could have a faulty adaptor. (the SD2Vita adaptors are fragile)
- The SD card wasn't properly zzBlanked or formatted. (also quite common)
After all the data has copied from your current UX0 (the Sony memory) to the card the app will then set your SD as the primary storage and set the Sony memory card (if applicable) as a secondary storage (uma0:). This is only really useful if you have a good size Sony card, you can remove the Sony card and put it safely away just in case its needed in the future.
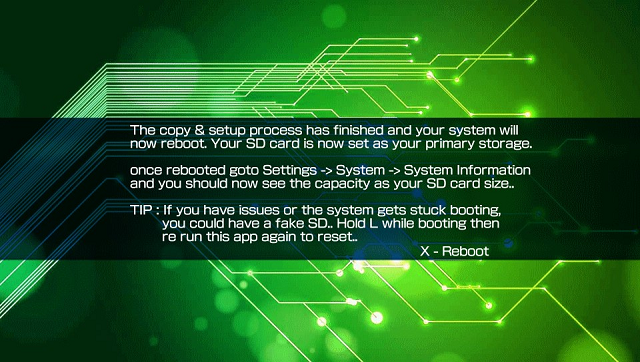
Finally, after the system reboots again with the new allocations and newly copied SD you can go into Setting > System > System information, you should now see your SD cards memory size (Capacity). Be aware - the size show is and should always be much smaller then the printed size (usually around 93%).
Examples of good SD capacity:
- 128gb shows as between 116gb -> 119gb.
- 256gb shows as around 238gb.
- 400gb shows as around 372gb.
- 515gb shows as around 476gb.
Note: Any SD cards showing higher values than these are most likely fake.
Preparing the SD
There are 2 methods for preparing your SD, through PC or on Vita using the app.
PC Method:
You can either unlock the additional tool in the app itself if your card is not detected, or manually download the SD.Toolkit -here-, otherwise there are other more recognised methods where basically you will flash a file named zzBlank.img using the Win32Diskimager software to the card then fornat it as exFat.
If your SD is upto 128gb then format it with the file allocation as default but anything over 128gb NEEDS to be format at 64k or you card will waste space over time.
The SD.Toolkit is the easiest of the 2 PC options but either is fine, the general reason for this is that the Vita needs to write data at the very beginning of the card to recognise properly and needs to be in the correct storage format, the file allocation size is a little tricky to explain but basically 64k makes the wasted spaces smaller.
- For cards upto 128gb, use exFat and (default) file allocation.
- For cards over 128gb, use exFat at 64k file allocation.
On the Vita itself:
The app had SKGleba's StorageFormat tool included that runs on the Vita itself that should properly format the SD, this is a much easier way of preparing your SD card.
But if your card is a fake and manages to format, you may not notice until you run into issues.
Screenshots
Changelog
v2.3b
- Fixed SD values for cards such as Samsung Evo Plus
- App now grabs memory values from the git page
v2.3
- Fixed YAMT detection
- Removed unnecessary items
- Added basic SD Check and warning..
- (The app should now detect if your using a fake SD*)
v2.1b
- Quick and easy solution to setup your SD card allocations and automatically clone the UX0 to your card.
- Compatible with SD2Vita, PSVSD and USB on PSTV and Vita consoles.
- Run the app.
- Select your storage device (system them reboots).
- Run the app again.
- The app should detects your SD and clones the current storage to the card, reboots again and you should now have your SD as your primary storage.
- This now includes 2 options for preparing your SD.
- I have included my own FormatTool that runs on the PC to check, partition and properly format your SD card, this can also possibly detect fake SD cards.
- I have included SKGleba's StorageFormat tool that runs on the Vita itself to properly format the SD.. this is a much easier way of preparing your SD card BUT! if your card is a fake but manages to format, you may not notice until you run into issues.
External links
- GitHub - https://github.com/AntHJ/UX0toSD
- VitaDB - https://vitadb.rinnegatamante.it/#/info/724
